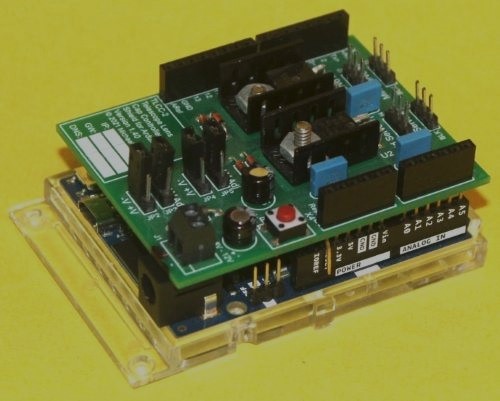
The stack
The TLCC "stack" contains two electronic circuit boards that actuate a servo to move the lens cap. It contains:
- Arduino Uno microcontroller with built-in WiFi connectivity (bottom)
- Servo "shield" (circuit board, top)
The stack must be installed on or near your telescope.
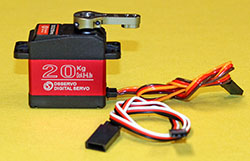
Servo
You may order the TLCC with one servo or two. You need one servo for each lens cap.
Each servo has an 11-inch cable to plug into the servo shield, and comes with a 12-inch extension cable if you need the extra length.
Note: The metal arm shown on the servo is not included. Instead, the servo comes with a bracket designed specifically to attach a lens cap to the servo (see below).
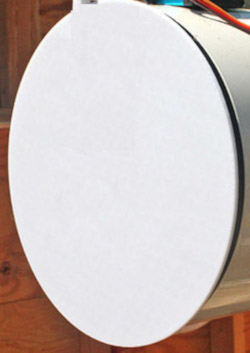
Lens cap
Your lens cap should be rigid and lightweight. Foamcore board works well, but can warp in high humidity. If you make a foamcore cap, seal the front and back with urethane varnish or several coats of spray paint. Also consider stiffening it by gluing a lattice of lightweight thin wood strips (e.g., bamboo skewers) on the front.
Another option is to 3D-print your lens cap. This Zip file contains .stl files for lens caps from 3 inches to 11 inches with a thickness of 0.08" or 0.10". You can send an .stl file to a commercial 3D-printing firm to make your lens cap.
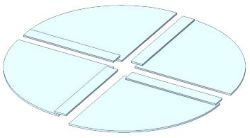
Large caps: The 9", 10", and 11" caps come in 0.08" thickness only, and consist of four sections that must be printed and glued together to make the full disk (drawing, right). An .stl file contains one ¼-disk section, so you'll need to print four copies. Each section has a flange that overlaps the adjoining section for strength and ease of gluing.
I can 3D-print a cap for you. Click the relevant button in the Buy Now section below to select a thickness and diameter (prices for the 9", 10", and 11" caps are for all four sections, not just one.)
My caps are printed with white PLA plastic. (I also can print black caps if you tell me you want that instead of white.)
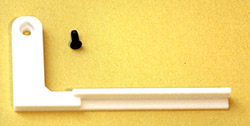
Lens cap mounting bracket
Each servo comes with a bracket to glue onto a lens cap, and a screw to attach the bracket to the servo shaft.
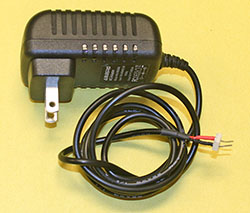
Power adapter
The TLCC comes with a power adapter that plugs into a regular household 120 VAC receptacle, and supplies 9 VDC to the stack. The cable has a two-pin connector that connects to a terminal block on the servo shield
Note: The power adapter may vary slightly from this photo.
Option: Temperature/humidity sensor
This optional sensor plugs into the servo shield so the TLCC can report ambient conditions at the telescope to the control program, which displays °F and °C, plus relative humidity.
The sensor has 9" leads, and is attached to a 3¾" plastic arm that you can mount near the TLCC.
Not sold separately. Please add the sensor when you order your TLCC system.

USB Flash Drive
The flash drive contains:
- The software program ("sketch") that is loaded onto the Arduino.
- The control program that communicates with the Arduino to open and close your caps.
- A 32-page user manual (PDF file). Click here to read it.