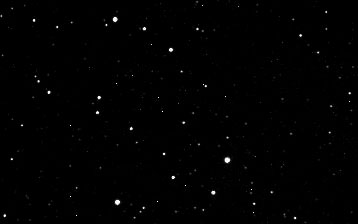
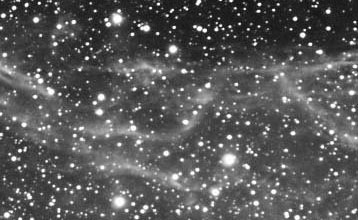
Except for stars, deep-space objects are very dim, and the human eye isn't sensitive enough to see the color, so looking through a telescope can be disappointing.
Don't be misled by the splashy color graphics on telescope boxes in stores. All you can see when viewing a nebula or galaxy through an eyepiece is a small dim "gray fuzzy," such as those shown on this page. (Opens in a new browser window. Close it to return here.) Not much detail or color to be seen!
This is why I don't look through my telescope. Instead, a digital camera attached to it acquires images of deep-space objects. There's no other way to see the color and detail.
Modern digital cameras and personal computers bring professional-level imaging to amateur astronomers. Read on to learn more.
As sensitive as digital cameras are, faint deep-space objects still require long exposures – often hours long – to capture enough light. But a single exposure can be ruined by light streaks from airplanes, meteors, or satellites:
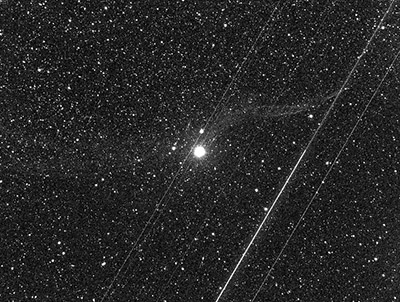
The solution is to take a series of relatively short exposures called subframes ("subs") of perhaps 5 or 10 minutes apiece, and combine them later. A ruined sub can be discarded without losing an entire night's work.
At least three satellites passed through the 10-minute sub above. This ruined sub represented only 3% of the night's exposures, so discarding it was not a big deal. Think of the frustration if half the night had been dedicated to that one exposure!
Even a short 5-minute exposure is long enough for the Earth's rotation to blur stars and details, so the telescope must track the target across the sky. Modern telescope mounts use high-precision gears and electronics to track objects but, unless they're equipped with "absolute encoders," they can't maintain pinpoint accuracy. For this, guiding is needed.
Automatic guiding ("autoguiding") uses a second camera controlled by software running on the observatory computer and connected to the telescope mount. The software identifies a bright "guide star," then monitors its position. If the star drifts even slightly from its original position, the software issues corrections to the mount to bring it back to center, so the image remains sharp.
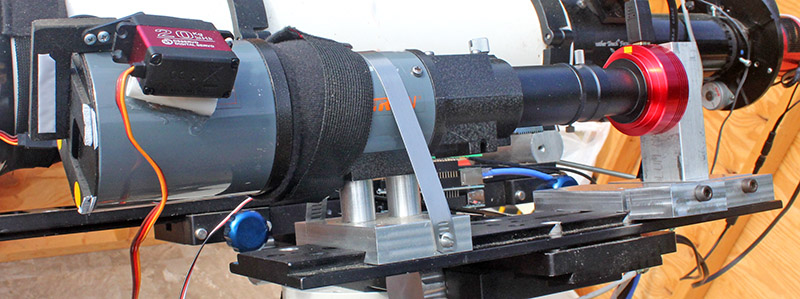
Autoguiding can be accomplished in three ways:
I use the third method, as seen here. The guide scope and camera are installed alongside the main scope. (The fabric wrapped around the guide scope is an electric heater that prevents dew from forming on the lens. The object with the wires is a servo motor that opens and closes the lens cap.)
Digital sensors add random electrons to those collected during an exposure. These unwanted electrons show up as light specks, or "noise."
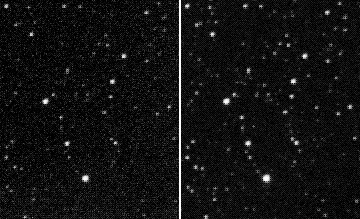
Cool sensors produce less noise than warm sensors. Many astronomy cameras have a thermoelectric cooler to lower the sensor's temperature. The left image, exposed while the sensor's temperature was 50°F, has more noise than the right image, exposed with the sensor cooled to -5°F
Look closely, and you'll see faint stars on the right that are hidden by noise on the left, a good example of how lower noise improves an image.
Images captured by the telescope camera must be processed with computer software after the imaging session. Here are the basic processing steps, but additional steps often are added to further enhance the final image.
Even images from cooled sensors contain some noise, so processing begins by subtracting a dark frame from each sub. A dark frame is exposed with the shutter closed for the same time period and with the same sensor temperature as the light frame, so it contains only camera-contributed noise.
The software subtracts the dark frame's pixel values from the corresponding pixels in the light frame to remove nearly all the noise.
It's not uncommon for light frames to contain shadows from dust motes on a telescope lens, mirror, or optical filter. Also, some telescopes vignette the image so it is brighter in the center than around the edges.
These defects can be removed by applying a "flat frame" to each light frame. A flat frame is an image of an evenly illuminated ("flat") target, and contains only the optical anominalies present in the light path. Here is a typical flat. Notice the vignetting, and the three dust motes (gray circles) at the bottom.
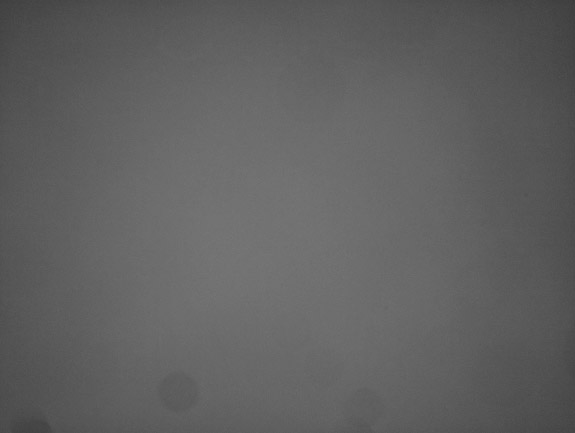
A flat is created by pointing the telescope toward a certain area of the sky just before sunrise (a dawn flat) or just after sunset (a dusk flat). A flat-white surface or an electroluminescent light panel also can be used.
The processing software mathematically applies the flat frame to each light frame to remove the optical defects.
Next, "cosmetic defects" are removed by statistically analyzing the pixels in a sub, and replacing outlier pixels with median values of surrounding pixels.
Sometimes major defects like the satellite trails seen above can be eliminated by this process, but sometimes not. If not, I can discard the defective sub.
Even with autoguiding, images in subframes are never precisely aligned with each other. If misaligned subs are combined, details become blurred, and faint areas vanish into the background.
So the next step is to align the stars in all the subs. The processing software shifts each subframe so its stars match those same stars in a reference image. Of course, the entire image is shifted, so everything lines up, and the subs are ready for the next step, stacking.
Once camera subframess are calibrated and aligned, they are stacked (combined) into a single image. Stacking involves producing an image where each pixel contains the average value of the corresponding pixel in every sub.
This improves the signal-to-noise ratio, because signal increases directly with the number of subs, but noise, being random, increases only as the square root of the number of subs. For instance, averaging 25 subs multiplies the signal by 25, but multiplies the random noise by only 5. Both results then are divided by 25. yielding the original signal level, but only ⅕ the noise level.
Light from deep-space objects is faint, so images appear almost dark when viewed on a computer screen. Only bright stars are visible, as seen in the left image below.
The image is in there! To see it we need to "stretch" the image to make everything that isn't black brighter. Compare the raw image on the left with a stretched version on the right.
|
|
|
Sophisticated processing software offers many additional tools to improve the final image, but I won't cover them here.
The final step is to save the fully processed and stretched image in a format that can be sent to a photo lab for printing, or uploaded to a website.
After processing, the original camera subs are kept because they represent a significant effort imaging under clear dark skies that might occur only rarely.
Files created during processing can be deleted because they are used only by the processing software, and will be recreated if the image is reprocessed another time. The final stacked image is always kept, as is the stretched version.
Traditional astronomy cameras record monochrome images. Three sets of monochrome subs are exposed through red, green, and blue filters placed in the light path. These subs are combined during subsequent processing to produce the final color image.
Some astronomers still use monochrome cameras and color filters, but I and others now use "one-shot color" cameras that record a color image with a single exposure. This feature adds an extra step during pocessing, but it requires less time to acquire images.
For example, instead of spending 7½ hours on three sets of 15 10-minute exposures (2½ hours per set), a color camera needs just one set of those 10-minute exposures, 2½ hours total. In fact, modern color cameras are so much more sensitive than previous cameras, the actual time might be much shorter than 2½ hours. Technology has made great strides recently.
Updated May 23, 2023